Did you know that you can turn one succulent into dozens with simple propagation techniques? Many plant lovers find that to propagate succulents is not only rewarding but remarkably easy! In just a few steps, you can multiply your plant collection or even share delightful gifts with friends. This article promises to guide you through the ins and outs of succulent propagation, showing you how pruning can also help maintain your plant’s health and aesthetics. Ready to dive into the green world of succulents and discover endless possibilities? Let’s get started!
Understanding Succulent Propagation
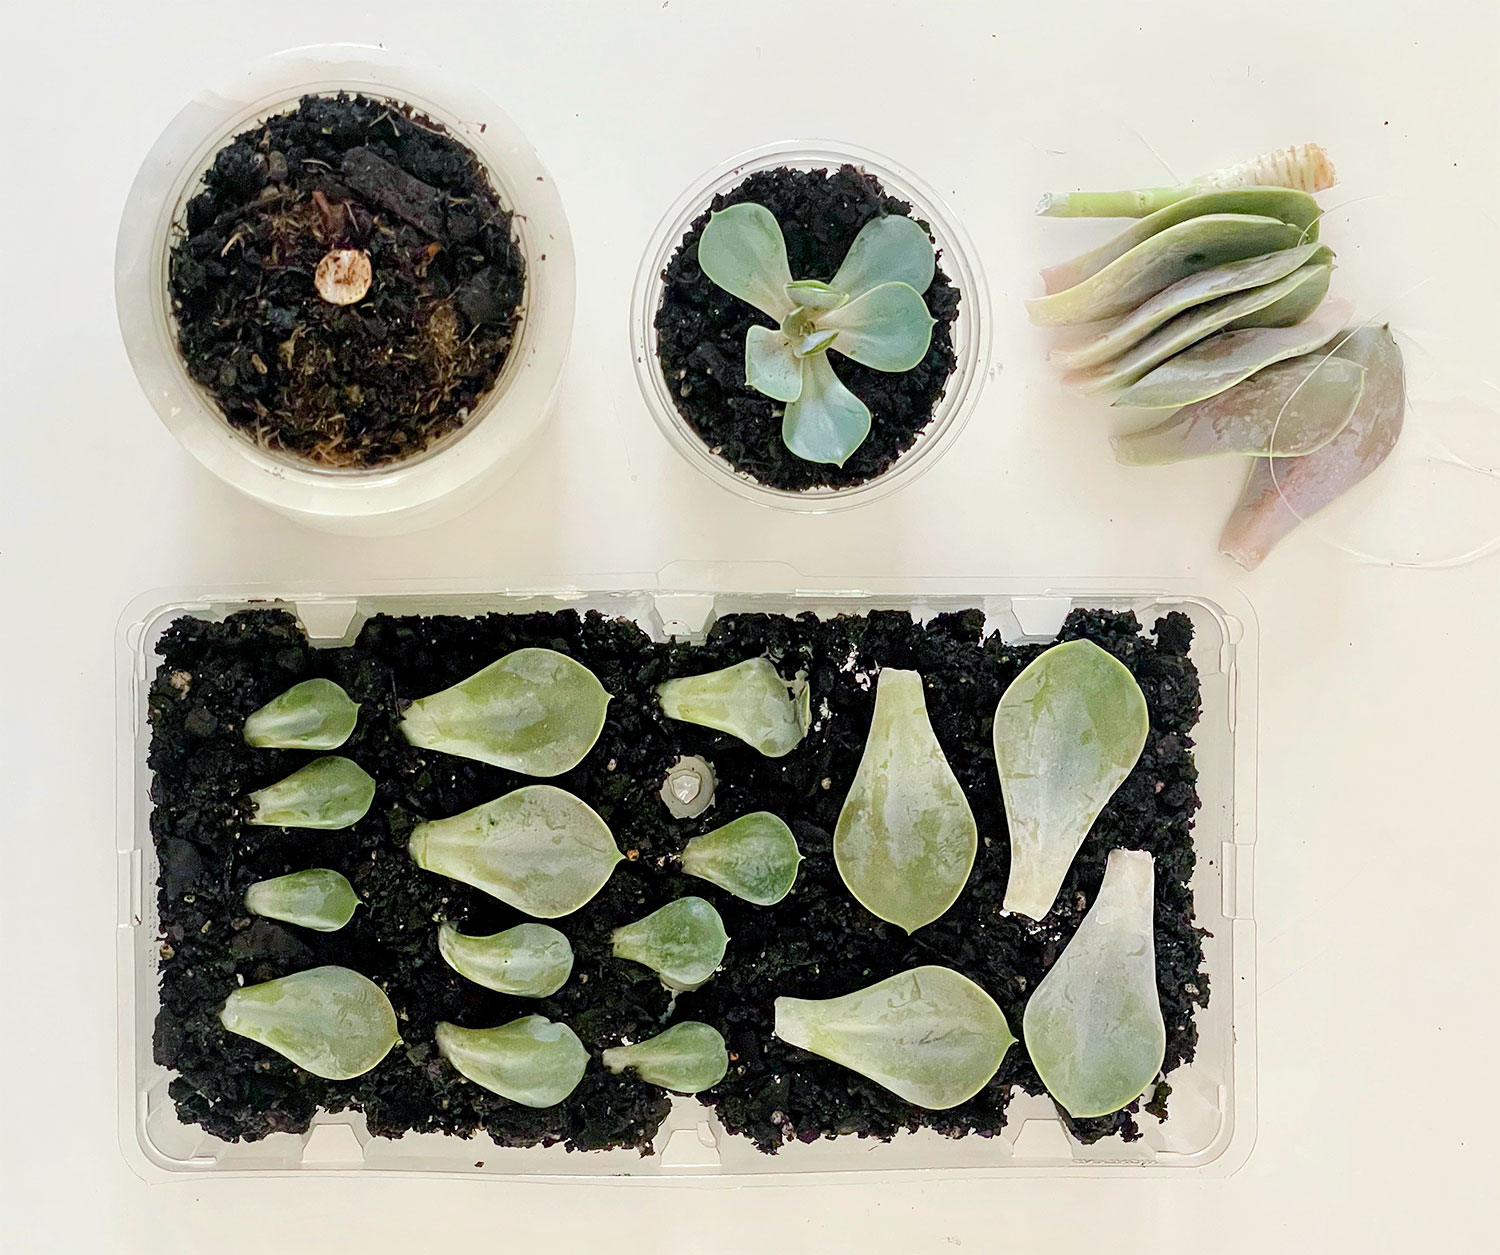
Succulent propagation is the art of creating new plants from existing ones, utilizing various parts such as leaves, stems, or roots. One of the primary reasons propagating succulents is popular is the joy of successfully multiplying your plants! Not only does propagation help in maintaining an overgrown succulent, but it also enables you to share beautiful additions to your collection. Popular methods include:
- Leaf Propagation: Remove individual leaves and allow them to sprout new roots.
- Stem Propagation: Cutting a stem and planting it to grow new pups.
- Water Propagation: Submerging parts in water to stimulate root growth.
- Soil Propagation: Placing cuttings directly into soil.
Whether you choose to propagate through soil or water, your succulents will thrive if proper techniques are followed.
When is the Right Time to Propagate Succulents?
The best time to propagate succulents is during their active growing season, which typically spans spring and summer. However, you can propagate succulents any time of the year. Just keep in mind that results may take longer in the fall and winter. Pruning is an excellent prompt for propagation; for instance, if a succulent looks leggy due to inadequate sunlight, it can be an ideal opportunity to create new plants. An etiolated Echeveria can provide over ten new succulents from its leggy stem!
Step-by-Step Guide to Propagate Succulents
Now that we understand when to propagate, let’s delve into the steps to do it effectively:
- 1. Water Your Mother Plant: Hydrate the parent succulent and wait three days before cutting.
- 2. Cut the Stem: Use clean scissors to cut the stem at the soil line.
- 3. Remove Bottom Leaves: Gently twist and remove lower leaves to prepare for propagation.
- 4. Let Callous: Allow the cut pieces to dry and callous for 3-5 days.
- 5. Replant: Plant the cut stem in well-draining soil and prepare the leaves for propagation.
- 6. Place in Bright Light: Ensure that all newly propagated pieces receive indirect sunlight.
- 7. Keep Lightly Watered: Water every few days to keep the soil moist but not soggy.
- 8. Pot Rooted Plants: Once roots have developed, pot the new plants into fresh soil.
Each of these steps is crucial in ensuring successful propagation, allowing you to watch your crowd of plants flourish!
Which Method is Most Effective for Propagating Succulents?
While each propagation method can be effective, preferences vary among plant enthusiasts. Here’s a quick comparison of different techniques:
- Soil Propagation: Produces robust plants quickly but requires precise soil contact.
- Water Propagation: Allows for clear visibility of rooting but can be tricky to manage.
- Air or Dry Propagation: Provides an exciting method yielding unique plants but may require more patience.
In any case, patience is essential. Remember that succulents are generally slow-growing plants, requiring time to show signs of progress. Don’t be discouraged by the wait; the adventure of propagating succulents is fun, educational, and immensely satisfying!
Common Challenges in Succulent Propagation
As with any gardening endeavor, challenges can arise. Here are a few common obstacles:
- Overwatering: Be cautious; succulents are susceptible to rot.
- Pest Infestation: Keep an eye on new plants for any pests.
- Insufficient Light: Ensure your plants are receiving adequate, but not overwhelming, light.
Despite these challenges, the rewards of propagating succulents far outweigh any difficulties. With each attempt, you’ll grow more skilled in your techniques!
To deepen this topic, check our detailed analyses on Diy & Tutorials section